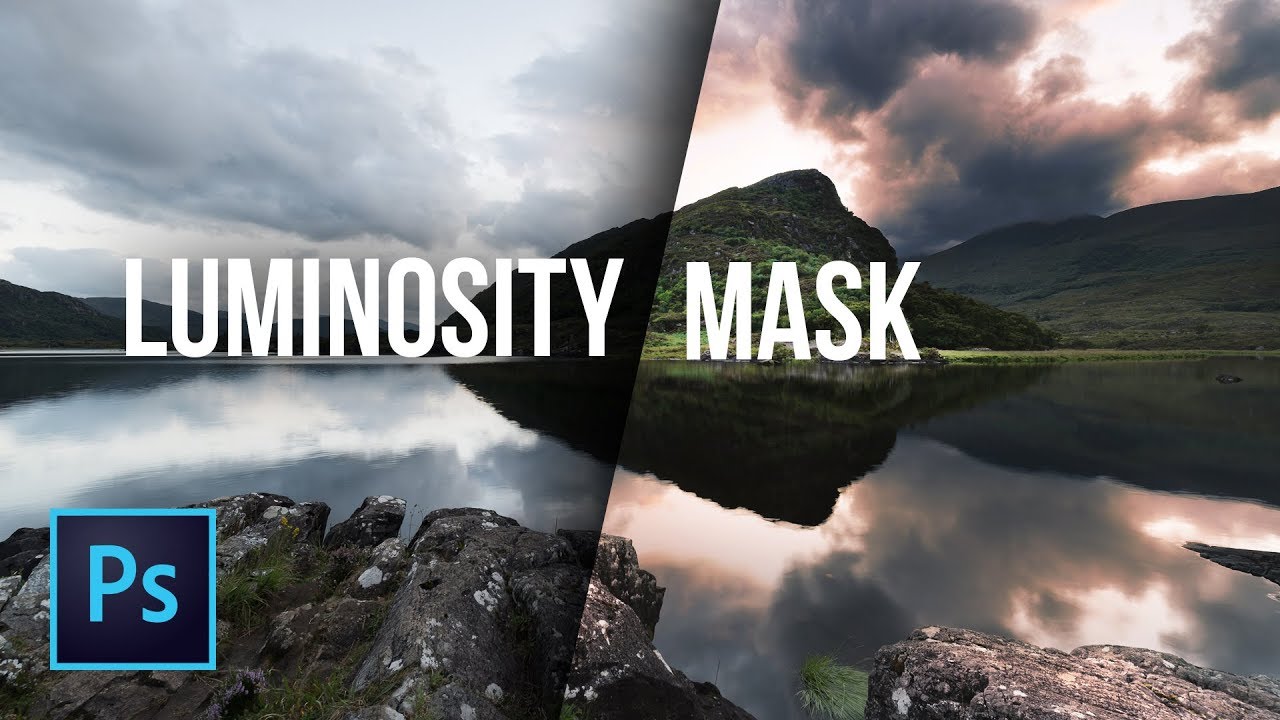
Luminosity Masks in StepbyStep Guide

How to Create and Use Luminosity Masks in Adobe
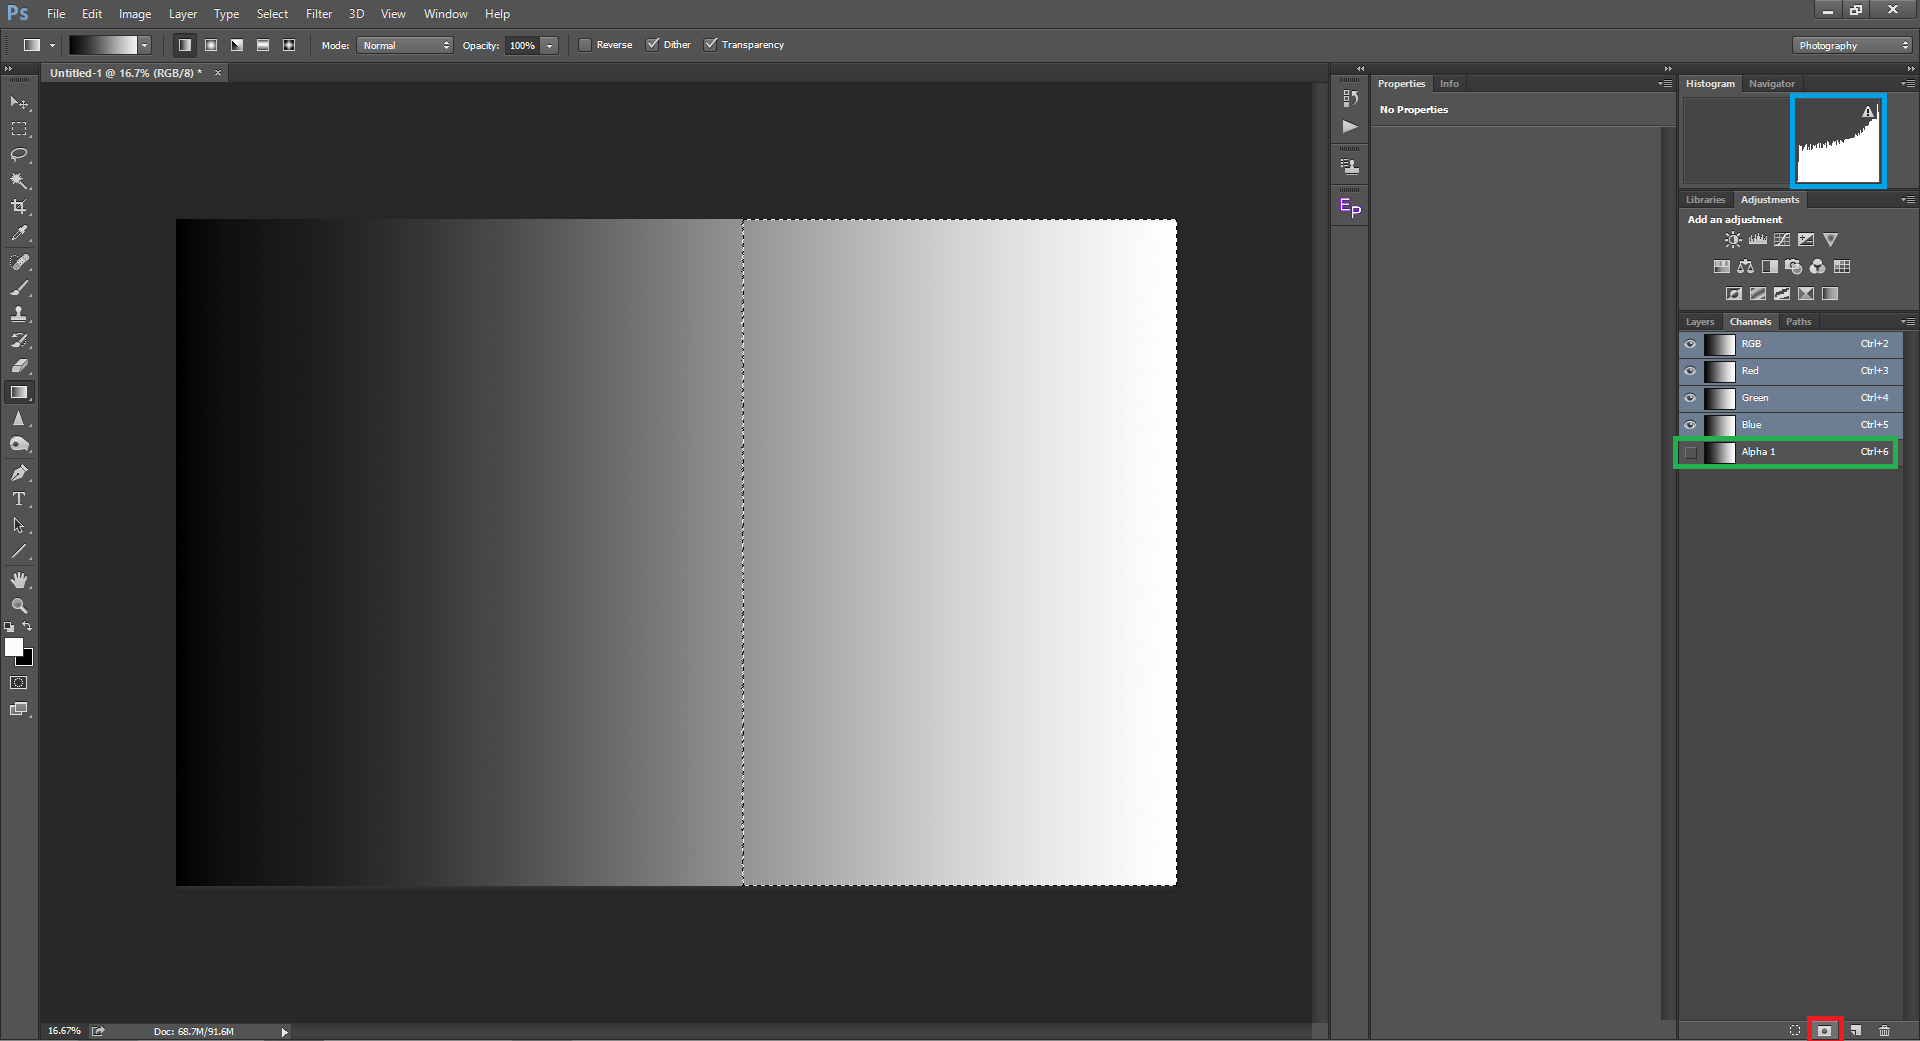
Step 1: Load The Luminosity Mask As A Selection The first thing we need to do is switch over to Photoshop's Channels panel which you'll find grouped in beside the Layers panel. Click on its tab at the top to select and open it: Opening the Channels panel by clicking on its tab.
The Complete Guide to Luminosity Masks in
Luminosity Masks have become a popular type of selections in Photoshop used by both professionals and beginners alike. However, unlike many other types of selections, they won't be found in.

The Power Of Using Luminosity Masks In
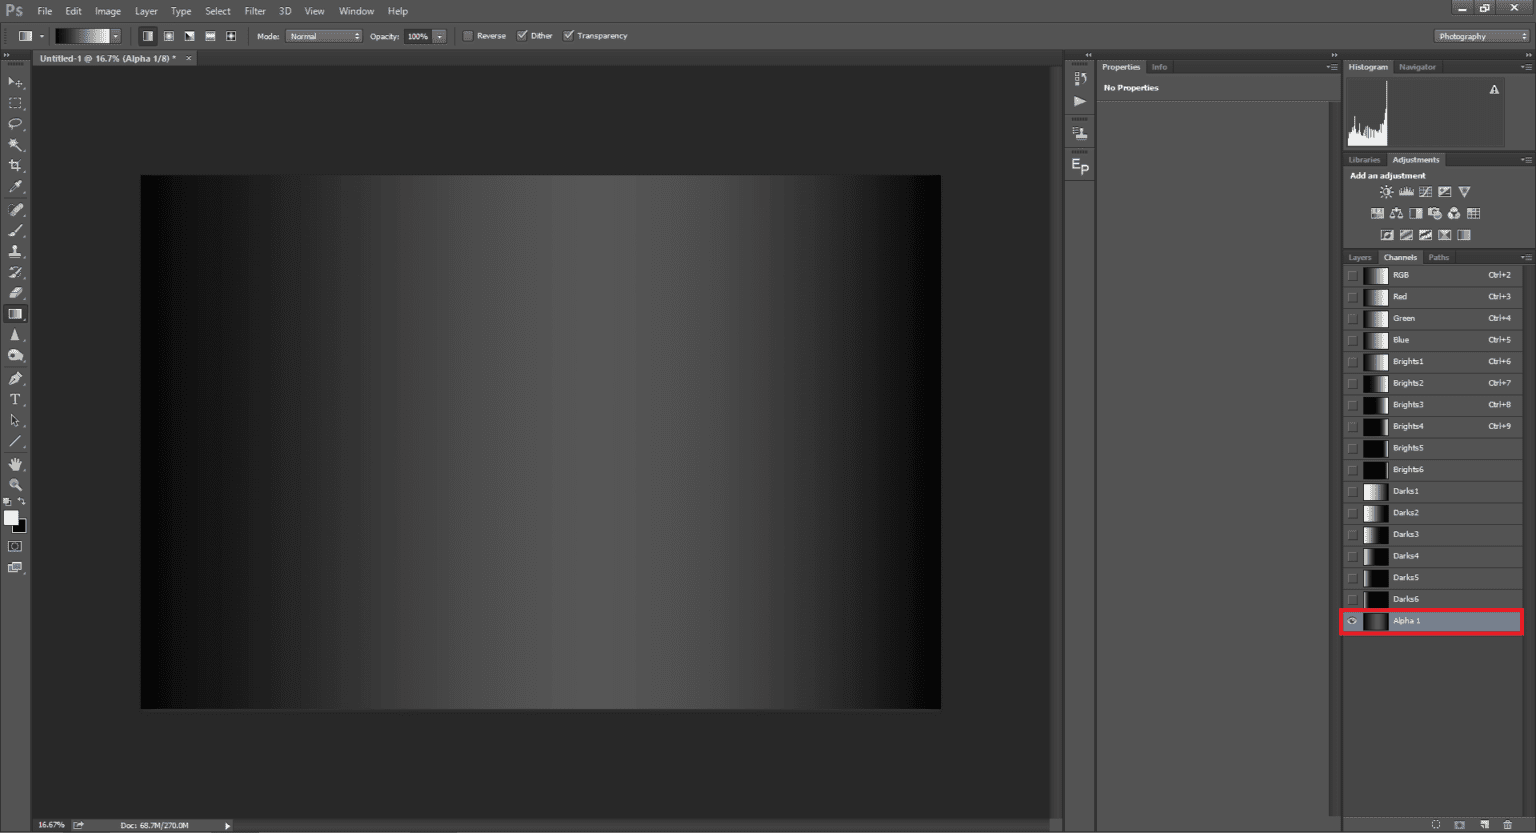
1. Open the Channel Panel 2. Ctrl/Cmd+Click on the RGB Thumbnail to load the Luminosity 3. Click the new Channel Button to make a channel out of the selection 4. name it light 1 (These are your highlights) 5. Press Ctrl+Alt+Shift (Cmd+Option+Shift) and click on the Light 1 thumbnail to Intersect the selection. 6.

How to Create Luminosity Masks for Better Retouching Fstoppers
The idea is that you use the luminosity (brightness) or color/saturation of the image to make selections. Basically, you can tell Photoshop to make adjustments to just the bright blue pixels in the sky, put more contrast in the mid-tones of those buildings, or give those green colors more pop.
Luminosity Mask Tutorial Simplify Targeted Selections
Create Luminosity Masks Visually! Without having to worry about selections, channels and all those complicated stuff in Photoshop. Learn how to use Luminosit.

SUPER EASY Luminosity Masks in YouTube
The TK Lum-Mask plugin provides an easy way for photographers to start using luminosity masks. This plugin is designed using Adobe's Unified Extensibility Platform (UXP) for plug-ins. It works starting in Photoshop 2021 on both Windows and Mac computers (including Mac M1). The image shows the plugin's different interfaces.

An Introduction To Luminosity Masking Tutorial) YouTube
Lumenzia is a luminosity masking panel that is an add-on application that works within Adobe Photoshop. It allows you to quickly create and efficiently use a wide range of luminosity masks for your image editing. To understand how Lumenzia works, because it is a little technical, you need to understand how Photoshop layers work.
The Complete Guide to Luminosity Masks in
Luminosity Masks are a method of making selections in your image based on the brightness values of the pixels. They are used as a tool by photographers to edit their images with incredible control. The term Luminosity Masks, although a good description, can strike fear into many.

The Power of Luminosity Masks in Fstoppers
The TK Lum-Mask plugin uses Photoshop's Layers panel to display masks on-screen at real-time speeds. Mask-based interface. See masks up front to make intelligent choices about which one to use. Bit depth of masks matches that of the image. 16-bit images have 16-bit masks, and the bit depth is maintained throughout the process of generating and.
How To Color Grade With Luminosity Masks In
Luminosity masks are one of the most powerful tools when it comes to selection. If you are new to Photoshop or unfamiliar with layers and layer masks, we have a comprehensive beginner's guide to Photoshop. This article requires an understanding of layers and layer masks, both of which are covered in the beginner's guide. Table of Contents

How to Create and Use Luminosity Masks in Adobe Tuts+
March 24, 2022 I'm happy to announce the release of a FREE luminosity masking panel for Photoshop: Lumenzia LITE. This panel allows you to quickly create 16-bit luminosity masks, channels, and selections. It's completely new and a major improvement over my previous free panel (including native support for Apple Silicon / M1).

Two Great Methods For Creating Luminosity Masks in [Stepby
Luminosity Masks in Photoshop are selections with a tonal basis that allow you to affect only certain part of the photo. These selections are "programmed" at changing only darks, mid-tones and brights, so only these parameters are subjects to altering.
A Simple But Effective Way to Create Luminosity Masks in
10 Software Photoshop Start Watching description Have you ever tried taking a photo of a jaw-dropping landscape only to have the sky be washed out or the ground be dark and without detail. Until now, HDR was the only option to get details across highlights, midtones, and shadows, but it would often create exaggerated effects.

Easy Luminosity Masking in Lenscraft
What are Luminosity Masks? So, what are Luminosity Masks? Simply put, they're tone-based selections which make it possible to make targeted adjustments to only specific areas of the image. These masks can select the brights, mid-tones or darks, without affecting other parts of the photo. Luminosity Masks aren't found in any menu within Photoshop.
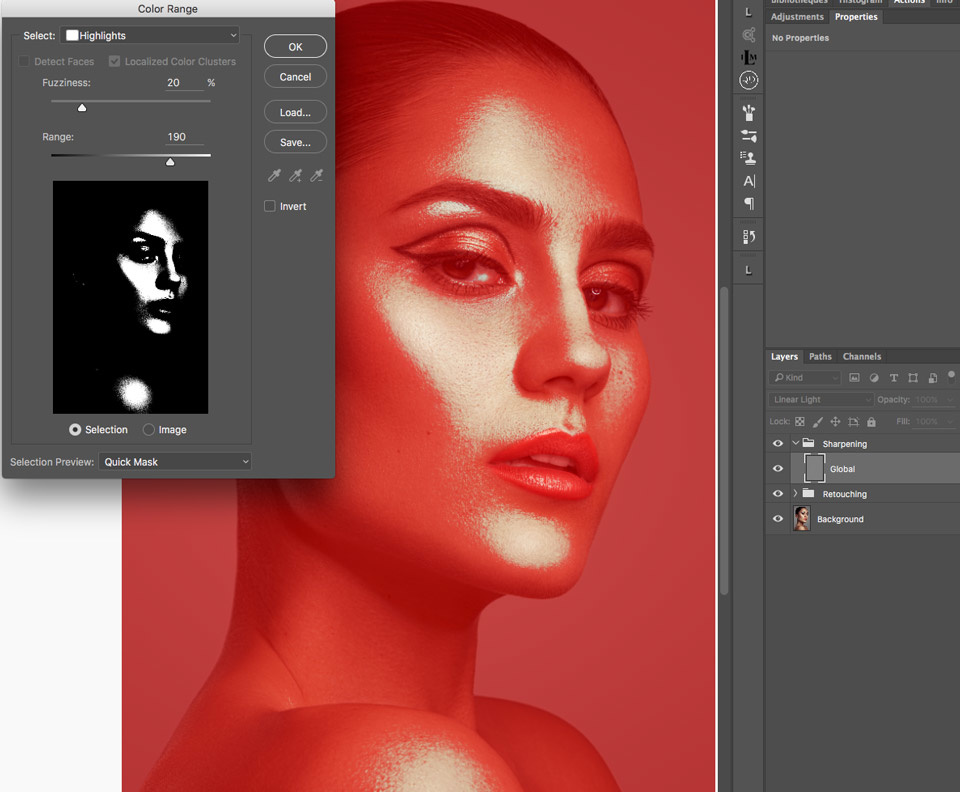
How to Enhance Skin Texture With Sharpening and Luminosity Masks
Step 1 The first selection is of the luminous values of the image. Creating this selection is fundamental to this technique as the other selections are all based on this one. As important as this is, there's no menu or tool to be found to create it. It's almost like Photoshop's secret handshake.

How To Create Luminosity Masks In YouTube
luminosity masks are a very powerful way to adjust images in Photoshop. This original tutorial shows you that they don't have to be difficult or time consuming. Colin Smith shows you how to.
